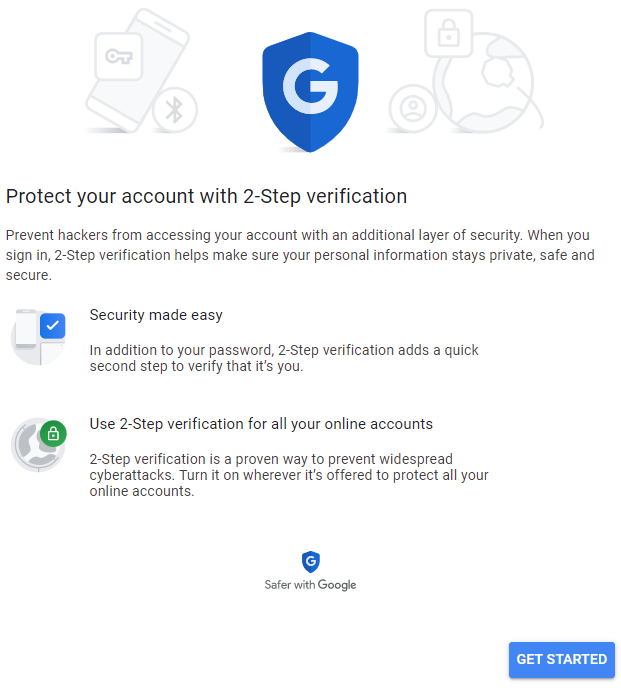
Two-step verification (2SV) provides an extra layer of security for your UCSB Connect account(s).
The 2SV formula combines 2 factors: “something you know” (such as your username and password) and “something you have” (such as a temporary code sent to your phone via voice/text or a USB key).
Note: To enable 2SV on your UCSB Google account, you will need a phone in order to receive an activation code from Google via voice/text.
Step 1: Go to https://myaccount.google.com/signinoptions/twosv
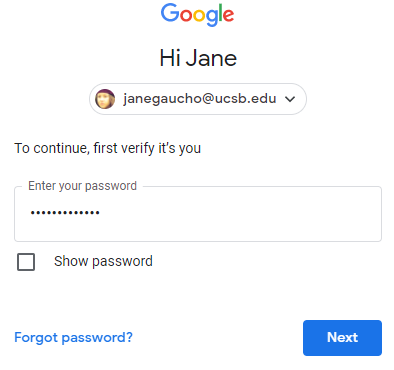
Step 2: Click Get Started and sign in to your account using your UCSBnetID@ucsb.edu email address.
Step 3: Enter your password
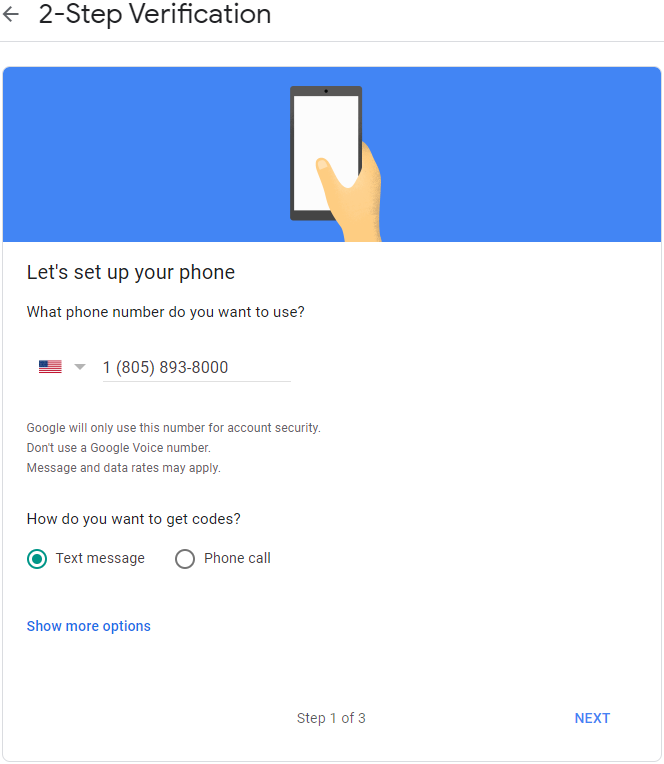
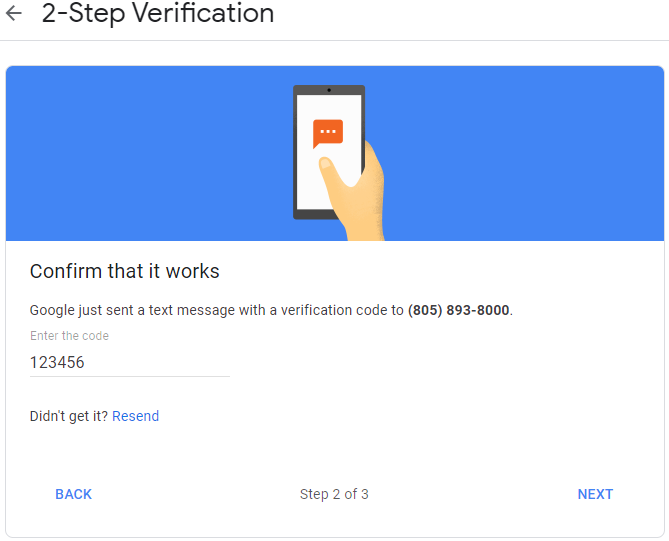
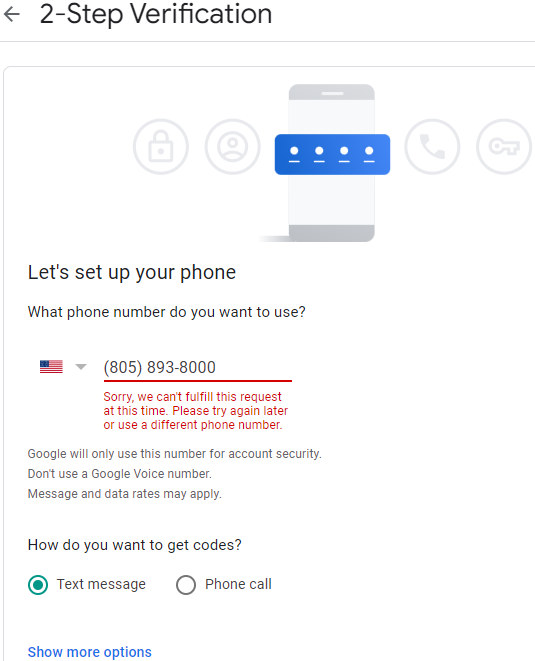
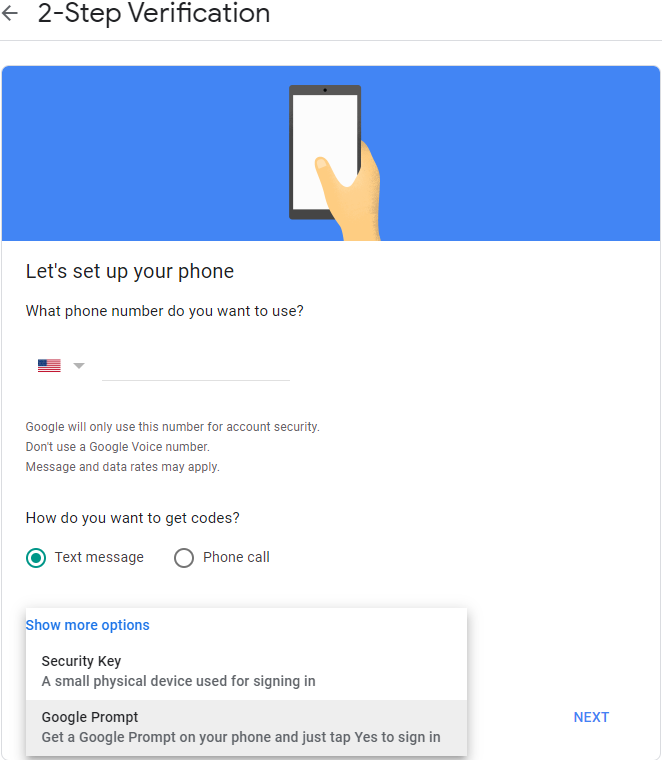
Step 4: Enter your phone number, delivery preference (Text message or Phone call), and then click Next.
Step 5: Enter the verification code you were provided by text/phone and select Next.
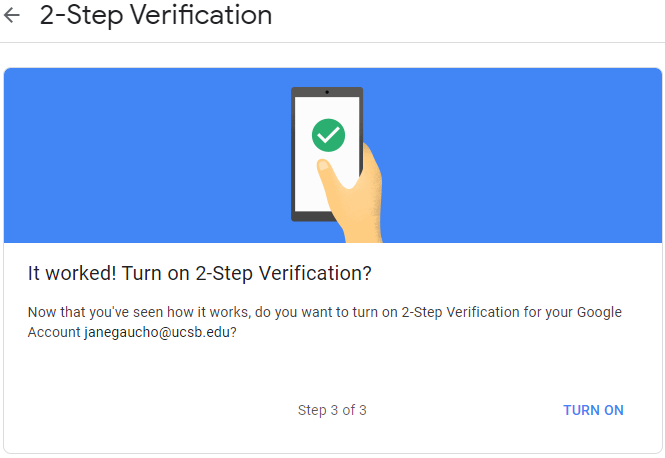
Step 6: Click Turn On.
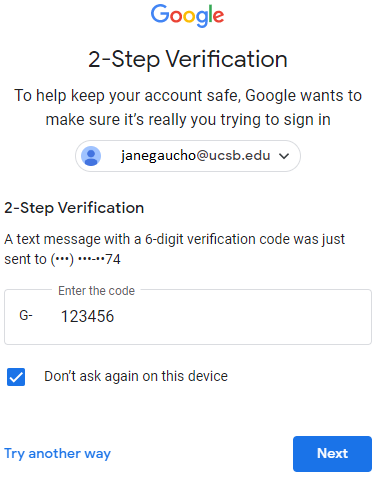
Step 7: You have now activated 2SV. Even if you “trusted” your computer, you will still be prompted to enter another 2-step verification code whenever you sign into your account. In the Google Web App, the code prompt will look like this:
When enrolling in Google's 2-Step Verification (2SV) you can add additional phone numbers that can receive text messages for verification.
After you enroll your first phone number, go back in to the 2SV settings. Click Add another phone number.
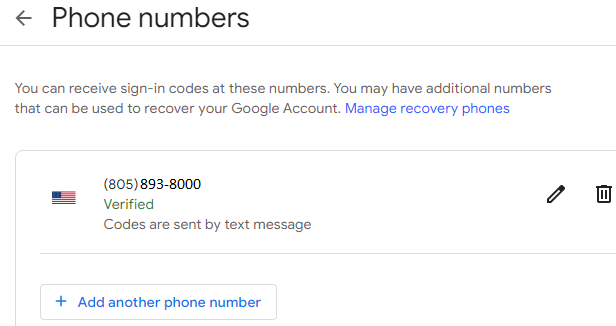
Note: the first phone number registered with 2SV will always receive the initial text message with the code. Then others signing into the account need to click the "Try another way" link to access the page with all the registered phone numbers where they can select their own.
To avoid this situation, consider delegating the account or using an authenticator app.

If you need to setup multiple accounts' 2SV with the same phone number, you can enroll in up to 5 account's 2SV with the same phone number during a 4-hour period. After enrolling the same phone number in 2SV for 5 accounts within 4 hours, you will receive the message below stating you have reached a limit.
After approximately 4 hours, you'll be able to continue enrolling the same phone number in 2SV for an additional 5 accounts.
Authenticator apps such as Duo Mobile and Google Authenticator can be used for Google's 2SV. You must register a phone number first before the Authenticator App option becomes available. After registering the Authenticator App, it becomes the default method for 2SV instead of the first phone number registered. This eliminates the first phone number registered from always receiving the initial text message with the code every time someone else is signing in.
The authenticator app can be used in two ways:
A. Everyone can scan the exact same QR code, either together in person or via Zoom. Doing this eliminates clicking the "Try another way" link and the authenticator app can be used by everyone who scanned the exact same QR code.
B. The authenticator app can also be an unused default method. Anyone signing into the account clicks the "Try another way" link (last screenshot) to reach the page where they can select their own number to receive the text message with the 2SV code.
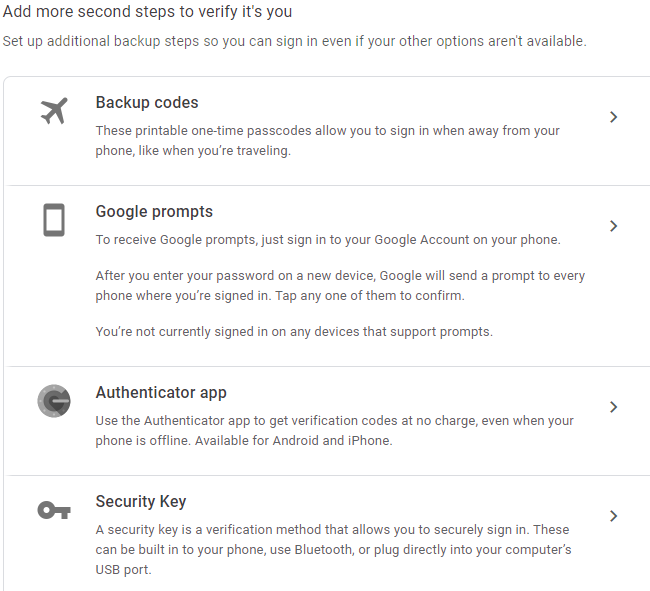
1. In the Add more second steps to verify it's you section, click on Authenticator App
2. Click Set up authenticator
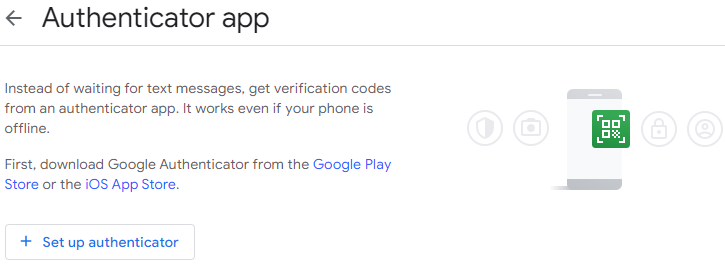
3. Open the authenticator app on your smartphone
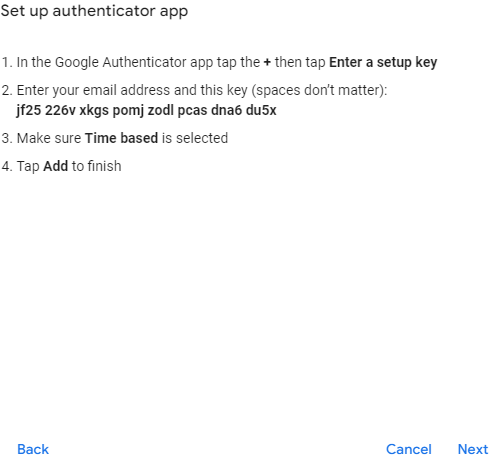
3a. Add the account (for Duo Mobile press Add+), select Use QR code (or equivalent), then scan the QR code
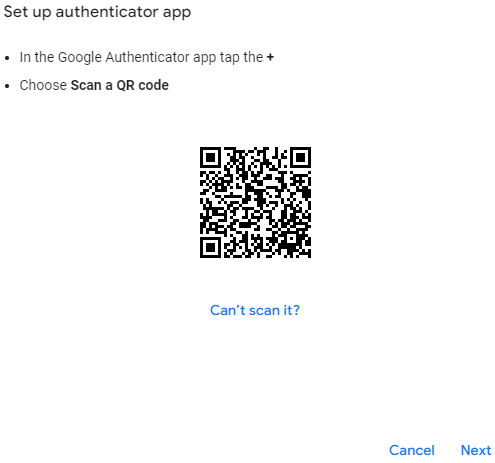
3b. If you are using an authenticator app that cannot scan QR codes, click Can't scan it?
Add the account to the authenticator app, select Google, then add the 32-character activation code, and click Next
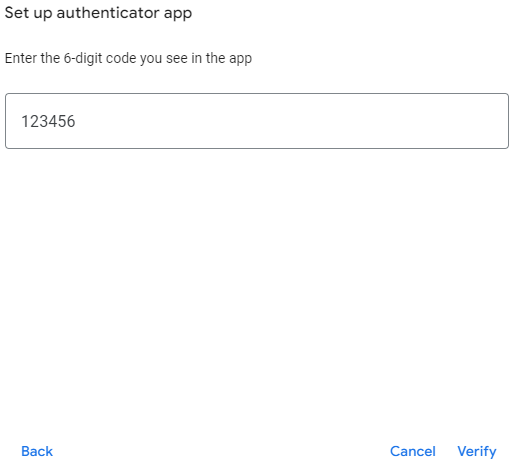
4. Add the 6-digit verification code displayed on your authenticator app screen
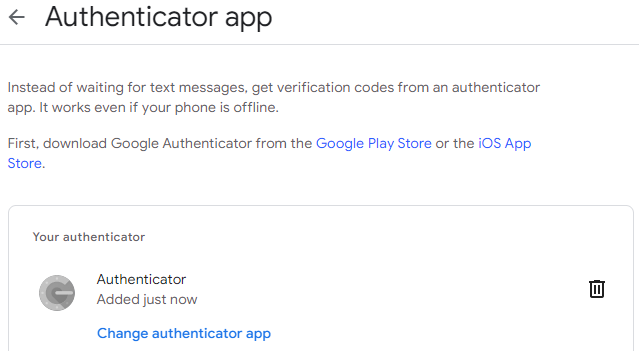
5. The authenticator app is now registered with the account's 2SV
6. Shared accounts with multiple phone numbers registered for 2SV can click the Try another way link to select their own phone number to receive the code
7. The authenticator app can still be used. Just open the app > show passcode > enter the passcode for 2SV
Note: for Duo MFA, up to 100 phone numbers can be registered for one functional account
You can also use Google Notifications or a Signature Key by clicking on Show more options.
Instructions for how to set up your Gmail account to receive Google Notifications:

If you are using a non-Android phone such as an iPhone or Windows phone, or if you use an email client on your computer such as Thunderbird, Apple Mail, or Mac Outlook, you will need to reconnect those apps and devices to your Google account. Google should prompt for this immediately after enabling 2SV:

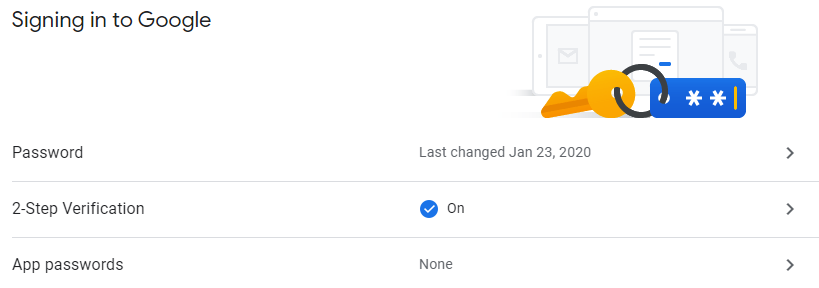
To reconnect your apps and devices at any time, visit https://myaccount.google.com/ and click Security, then follow the steps below:

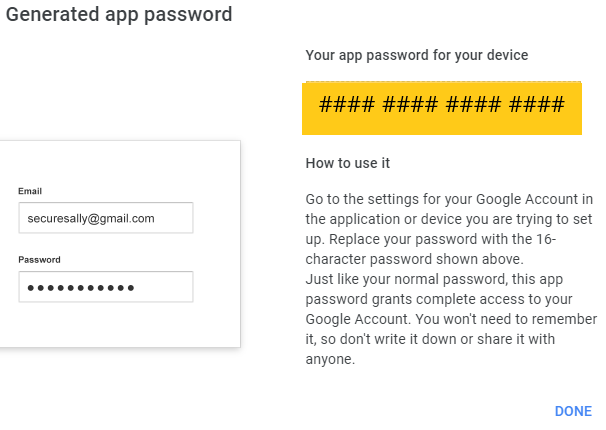
Under Signing in to Google, click App passwords (2SV must be enabled):
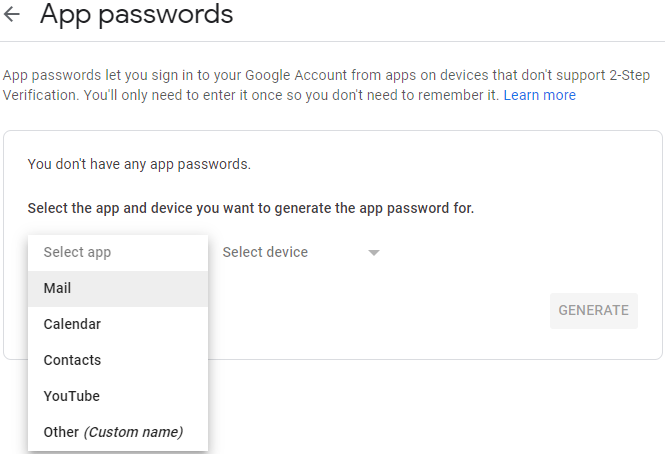
Under Select app > choose Mail:
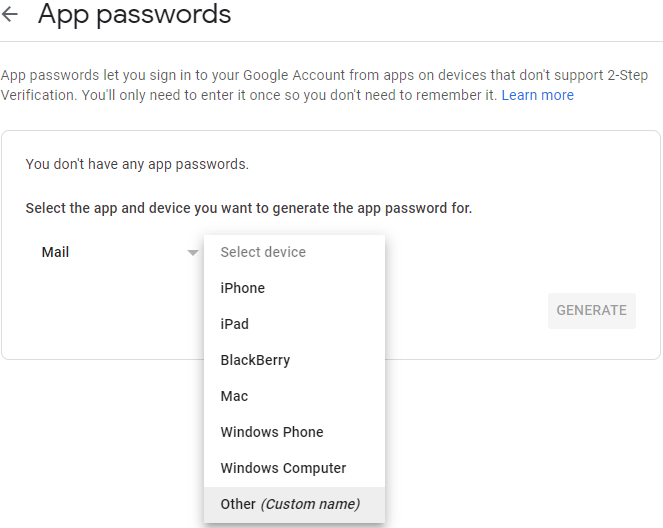
Under Select device > choose the device from the dropdown list. Click Generate. Then skip to the final step of these instructions with your "Generated app password". If you are using a device or mail client not shown in the Select device dropdown menu, such as Thunderbird or Outlook, select Other (Custom name) instead:
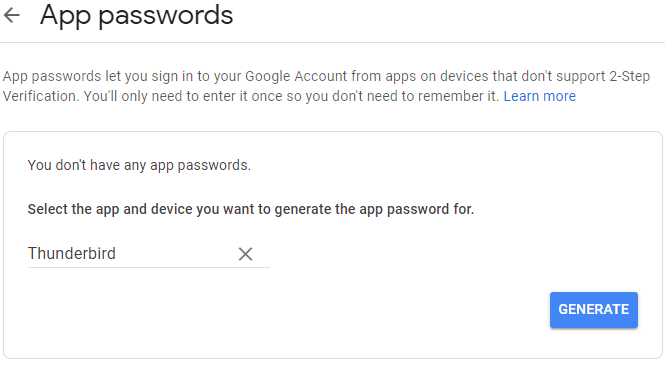
Enter the name of the "Other" mail client or device. Then click Generate:
Open the mail client or device with your configured Gmail account. When doing so, you will receive a prompt that your previous password is no longer valid and to enter the new one. Enter the 16-character App Password as seen on the Generated app password screen. You are now logged into your Gmail account with 2SV and your App Password as the authentication method.