Faculty, staff, students, and affiliates are required to authenticate via one of two methods in order to access their Connect Google Workspace email account:
1. Current faculty, staff, students, and affiliates, are required to authenticate access via SSO and Duo MFA.
2. Former faculty, staff, and students, with active accounts, are required to authenticate via Google's 2-Step Verification.
Click on the appropriate link below for your authentication instructions.
Current faculty, staff, students, and affiliates are required to use Single Sign-On (SSO) and Duo MFA when signing in to their Connect Google Workspace account (e.g., Gmail, Drive, Calendar, etc.).
1. Go to mail.google.com to sign into your Google Workspace account.
Notes:
- For the Email field, make sure to enter UCSBnetID@ucsb.edu
- If 2-Step Verification (2SV) is activated on your account, you will not be prompted for it
2. After clicking Next, you will be prompted for SSO. Enter your UCSBnetID and associated password.
Note: Enter your UCSBnetID and not your UCSBnetID@ucsb.edu email address.

3. After entering your SSO credentials, you will be prompted for Duo MFA. Select Push or Passcode (Push is recommended).
Note: select the box next to Remember me for 10 hours to remain signed into Duo MFA for the maximum amount of time.

Former faculty, staff, students, and affiliates are required to use Google's 2-Step Verification (2SV) when signing in to their Connect Google Workspace account (e.g., Gmail, Drive, Calendar, etc.). If you have not activated 2SV, follow these instructions here.
1. Go to mail.google.com to sign into your Google Workspace account.
Note: For the Email field, make sure to enter UCSBnetID@ucsb.edu
2. Enter your password, and click Next.

3. You will then receive 6-digit code via text message to verify. Enter the code and click Next.

You can access your Connect Google Workspace account using Outlook 2016 and newer on a Mac by following the steps in this configuration guide.
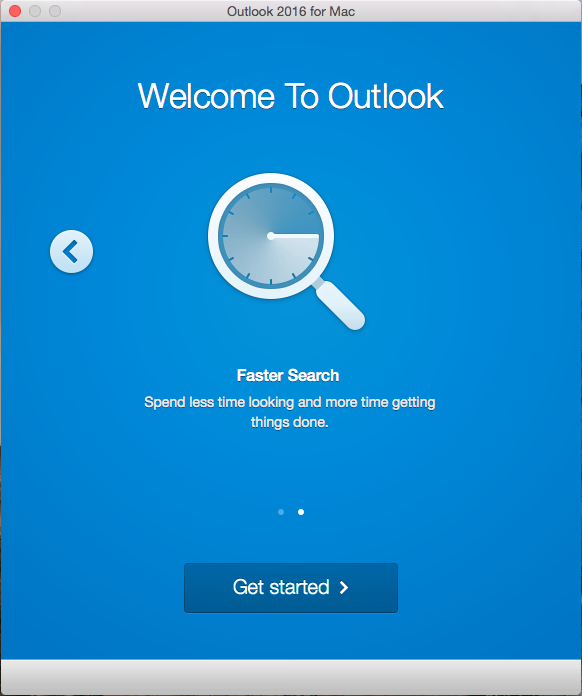
1. Open Outlook. If this is your first time launching the program, you will see the screen below. Click Get Started.
Note: If you don't see this screen, proceed to step 5.
2. Select Get Started >
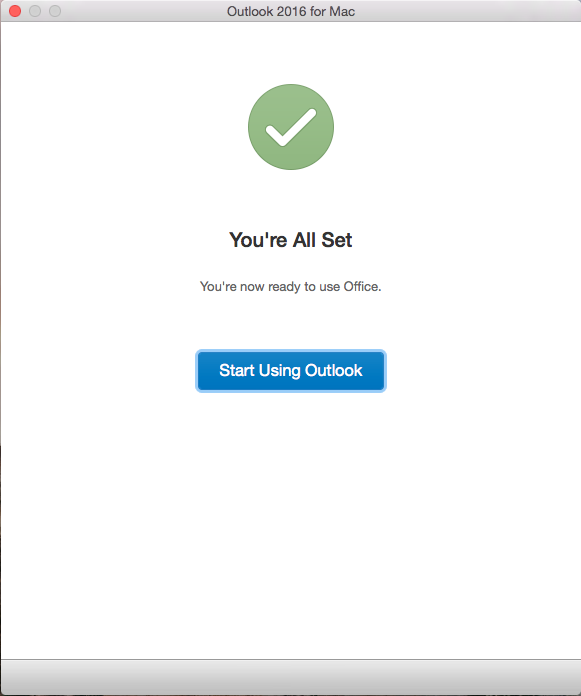
3. Select the > to Start Using Outlook
![]()
4. Select Start Using Outlook
5. If this isn't your first time launching Outlook, click on the Tools menu and select Accounts.
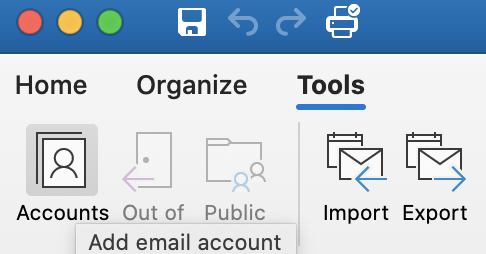
6. Navigate to the bottom left hand corner and click the "+" to add an email account
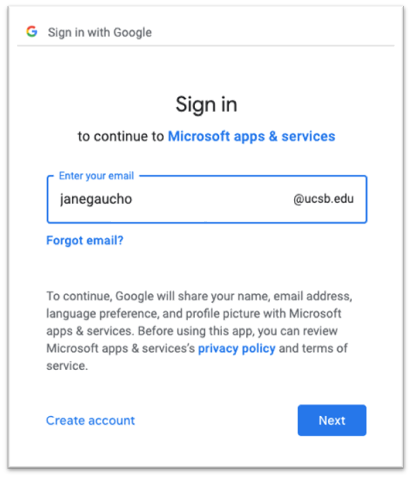
7. Enter your Connect account name UCSBNetID@ucsb.edu and click Continue.

7. Click Next
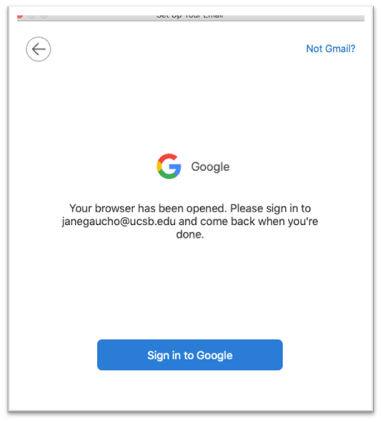
8. Click Sign in to Google
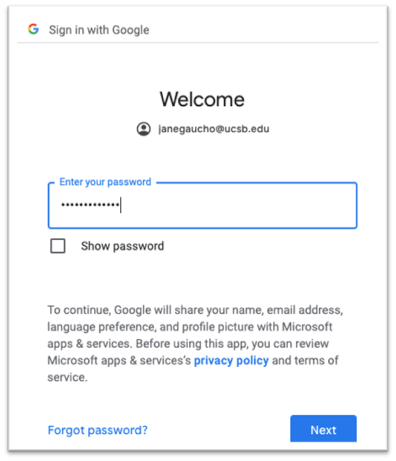
9. Enter your password and click Next
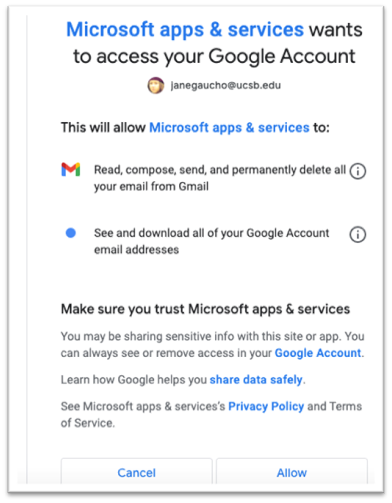
10. Accept the terms stated below by clicking Allow
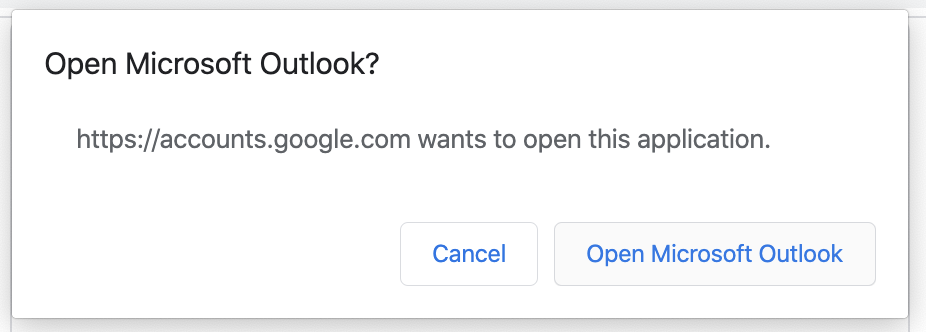
11. It will prompt you to open Microsoft Outlook. To do so, press Open Microsoft Outlook.
12. Outlook will let you know when your email has been set up. Then click Done and you are now ready to use your email on Outlook.
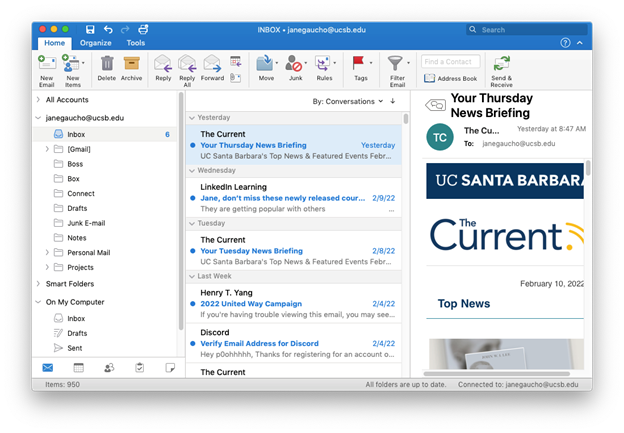
13. You should now see your Inbox as well as all of your other email folders.
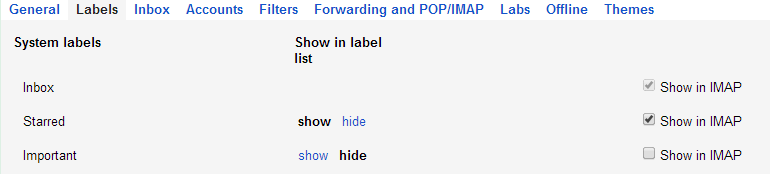
NOTE: If you use the Conversation view in your Inbox, you will see duplicates of messages marked Important. If you don't want to see duplicates, you can uncheck Show in IMAP for messages labeled "Important" in Google client using your browser. To do this:
14. Log into the Google Web App. Click the gear Settings icon to the upper right of your Gmail screen ![]() > click Settings > then See all settings.
> click Settings > then See all settings.
15. Click on the Labels tab and uncheck Show in IMAP for Important. After you have unchecked the box you may close the Google Web App window.